Category: Guides

  • Card Deity Quest in Ragnarok: The New World (Card System Unlock)

    Card Deity Quest in Ragnarok: The New World (Card System Unlock)

    The Card Deity quest chain is the cheapest way to build a card collection. No spending, no farming a rare drop, you walk to marked spots and collect. Cards are the biggest damage multiplier in the game, so the 40 free cards here are worth more than the Gold Coin they also pay.

    What the Card Deity quest unlocks

    • The 40 card quests. Each card quest is a marked spot on the map. Complete the interaction there and you get the card plus 150–200 Gold Coin and 1 Kafra Blind Box.
    • Observation point 113. The game data lists “Card Deity!” as the quest you must submit to unlock it.
    • The daily card box income. Community reports say that after finding enough cards, a card master NPC chain unlocks and brings a companion home, letting you collect boxes daily.

    The 40 card quests

    All 40 card quests are map markers with a card icon. Coordinates are in-game map coordinates.

    Prontera area

    MapQuestBase levelRewardCoordinates
    Prontera South GateCard quest: PoringLv 5Poring Card + 150 Gold Coin + 1 Kafra Blind Box(569, 272)
    PronteraCard quest: FabreNo level gateFabre Card + 150 Gold Coin + 1 Kafra Blind Box(191, 605)
    PronteraCard quest: HornetLv 10Hornet Card + 200 Gold Coin + 1 Kafra Blind Box(272, 445)
    PronteraCard quest: LunaticLv 10Lunatic Card + 200 Gold Coin + 1 Kafra Blind Box(451, 726)
    PronteraCard quest: Thief BugLv 20Thief Bug Card + 150 Gold Coin + 1 Kafra Blind Box(335, 526)
    PronteraCard quest: YoyoLv 40Yoyo Card + 200 Gold Coin + 1 Kafra Blind Box(734, 853)
    Prontera Sewer 1FCard quest: Female Thief BugLv 30Female Thief Bug Card + 150 Gold Coin + 1 Kafra Blind Box(117, 203)
    Prontera Sewer 2FCard quest: SporeLv 20Spore Card + 150 Gold Coin + 1 Kafra Blind Box(400, 158)
    Prontera–Geffen RouteCard quest: AmberniteLv 20Ambernite Card + 150 Gold Coin + 1 Kafra Blind Box(386, 478)
    Prontera–Geffen RouteCard quest: Savage BabeLv 15Savage Bebe Card + 200 Gold Coin + 1 Kafra Blind Box(391, 276)

    Payon area

    MapQuestBase levelRewardCoordinates
    East PayonCard quest: Worm TailLv 20Wormtail Card + 150 Gold Coin + 1 Kafra Blind Box(695, 299)
    PayonCard quest: BigfootLv 30Bigfoot Card + 200 Gold Coin + 1 Kafra Blind Box(595, 435)
    PayonCard quest: Greatest GeneralLv 55Greatest General Card + 200 Gold Coin + 1 Kafra Blind Box(682, 757)
    Forest DepthsCard quest: Beetle KingLv 55Beetle King Card + 150 Gold Coin + 1 Kafra Blind Box(742, 912)
    Desert–Payon TransitionCard quest: MukaNo level gateMuka Card + 150 Gold Coin + 1 Kafra Blind Box(412, 558)
    Desert–Payon TransitionCard quest: Steel ChonchonLv 50Steel Chonchon Card + 200 Gold Coin + 1 Kafra Blind Box(481, 67)

    Morroc area

    MapQuestBase levelRewardCoordinates
    MorrocCard quest: DropsLv 5Drops Card + 150 Gold Coin + 1 Kafra Blind Box(349, 861)
    MorrocCard quest: PickyLv 10Picky Card + 150 Gold Coin + 1 Kafra Blind Box(318, 428)
    MorrocCard quest: PickyNo level gatePicky Egg Card + 150 Gold Coin + 1 Kafra Blind Box(298, 396)
    MorrocCard quest: CondorLv 10Condor Card + 150 Gold Coin + 1 Kafra Blind Box(420, 403)
    MorrocCard quest: Baby Desert WolfLv 30Baby Desert Wolf Card + 200 Gold Coin + 1 Kafra Blind Box(541, 324)
    MorrocCard quest: Giant WhisperLv 95Giant Whisper Card + 200 Gold Coin + 1 Kafra Blind Box(341, 585)
    Sograt DesertCard quest: MagnoliaLv 55Magnolia Card + 150 Gold Coin + 1 Kafra Blind Box(524, 392)

    Geffen area

    MapQuestBase levelRewardCoordinates
    GeffenCard quest: Roda FrogLv 15Roda Frog Card + 200 Gold Coin + 1 Kafra Blind Box(954, 354)
    GeffenCard quest: SquirrelLv 40Coco Card + 200 Gold Coin + 1 Kafra Blind Box(638, 52)
    GeffenCard quest: Flying PetiteLv 80Sky Petite Card + 200 Gold Coin + 1 Kafra Blind Box(117, 363)
    GeffenCard quest: Ground PetiteLv 85Ground Petite Card + 200 Gold Coin + 1 Kafra Blind Box(92, 613)
    Geffen Underground B1Card quest: Baphomet Jr.Lv 60Baphomet Jr. Card + 200 Gold Coin + 1 Kafra Blind Box(88, 398)

    Mt. Mjolnir and the dungeons

    MapQuestBase levelRewardCoordinates
    Mt. MjolnirCard quest: MartinLv 40Martin Card + 150 Gold Coin + 1 Kafra Blind Box(195, 403)
    Mt. MjolnirCard quest: DrillerLv 65Driller Card + 150 Gold Coin + 1 Kafra Blind Box(337, 396)
    Mt. MjolnirCard quest: MantisLv 65Mantis Card + 200 Gold Coin + 1 Kafra Blind Box(318, 340)
    Labyrinth Forest 1FCard quest: Giant HonetLv 70Giant Hornet Card + 200 Gold Coin + 1 Kafra Blind Box(56, 13)
    Labyrinth Forest 2FCard quest: SasquatchLv 70Sasquatch Card + 200 Gold Coin + 1 Kafra Blind Box(283, 41)
    Orc Cave 1FCard quest: GolemLv 60Golem Card + 150 Gold Coin + 1 Kafra Blind Box(109, 196)
    Orc Cave 2FCard quest: ZenorcNo level gateZenorc Card + 150 Gold Coin + 1 Kafra Blind Box(210, 98)
    Abandoned Mine 1FCard quest: TarouNo level gateTarou Card + 150 Gold Coin + 1 Kafra Blind Box(74, 35)
    Abandoned Mine 2FCard quest: CrampLv 45Cramp Card + 200 Gold Coin + 1 Kafra Blind Box(190, 94)
    Undersea Tunnel 1FCard quest: MarinaLv 40Marina Card + 200 Gold Coin + 1 Kafra Blind Box(174, 38)
    Undersea Tunnel 2FCard quest: VadonLv 45Vadon Card + 200 Gold Coin + 1 Kafra Blind Box(200, 507)
    Sunken Ship 1FCard quest: Pirate SkeletonLv 50Pirate Skeleton Card + 150 Gold Coin + 1 Kafra Blind Box(78, 94)

    How to start the Card Deity quest

    Do this to progress the chain:

    1. Complete the Card Deity? quest so the card quest markers appear.
    2. Work through the card quests in level order, they are gated from Lv 5 to Lv 95, so do Prontera and Morroc early, leave Geffen and the dungeons for high level.
    3. Each card quest is a simple interaction at the marked spot: walk there, tap the interaction, take the reward. No fighting required.

    Rewards

    • 40 cards – one per quest, filling your Card Handbook.
    • ~7,000 Gold Coin total – 150 or 200 per quest.
    • 40 Kafra Blind Boxes – one per quest.

    Spare card copies can be fed in the Card Fuse system, which is itself unlocked by a separate system quest. Handbook progress and fused cards are permanent.

    Tthe card master NPC and daily boxes

    Community guides report that after finding a set of specific cards (Poring, Lunatic, Yoyo, and Bigfoot), a card master NPC chain unlocks that sends you to the starter town NPC. Finish that chain and you bring a companion home. The companion then pays out 5 boxes daily, each holding 35–45 Gold Coin (roughly 200 Gold Coin a day), with a chance to drop a self-select card book or a magic card book.

    This is community knowledge from the TW server build and is not confirmed in the SEA game data. Treat the daily box income as a bonus if it matches the live server.

    Related guides

  • Luminous Vale Guide: Modes, Rewards, and the Saturday Schedule

    Luminous Vale Guide: Modes, Rewards, and the Saturday Schedule

    Luminous Vale is a once-a-week, all-day Saturday event with three jobs to do: farm the respawning monsters, kill the Rainbow Chest Monster for a guaranteed purple card, and hit the four boss windows if you want Royal and Orange gear. It does not touch your daily combat budget, and the MVP Mount and MVP Card are on its reward list. If you want to avoid PvP, Peace Mode does that. If you want to hunt red players, Justice Mode is built for it.

    When it runs

    DayWindowNotes
    Saturday08:00 to 23:59 server timeAbout 16 hours, every week

    Luminous Vale modes

    Luminous Vale has three modes you can switch between.

    ModeWhat it does
    Peace ModeYou do not attack other players.
    Justice ModeYou can attack red-named players only.
    Battle ModeYou can attack any player.

    Peace Mode is the safe farm: you ignore PvP and focus monsters. Justice Mode is for hunting players who have gone red. Battle Mode is the full free-for-all.

    Check out the full events for Ragnarok: The New World.

    Free PvP and the killing penalty

    The map is free-PvP, but killing another player has penalty. Kill a player and you get flagged red. Once you are red, Justice Mode players can hunt you.

    If you only want the loot, stay in Peace Mode.

    What to do inside

    The four boss windows

    Four bosses spawn through the day at fixed times: 09:00, 12:00, 15:00, and 18:00. Team up and head to channel 1 (line 1). The party that lands the last hit gets the reward. Around each boss, secret-realm chests refresh, and anyone can pick those up.

    The Rainbow Chest Monster

    This is the event’s best target. It spawns at random spots around 7 times between roughly 09:00 and 22:00. Killing it drops a Rainbow Chest, and that chest guarantees one random purple card.

    Rainbow Chest Monster is level 55 with 8,000,000 HP. It is Formless, Neutral element, Medium size. Its loots are the Rare Item Card Book, a purple-quality card book.

    Because the spawns are random, you search the whole map for it. Do not sit on one spot.

    The respawning monsters

    The ordinary monsters inside Luminous Vale keep respawning, which is the steady farm. The guides call these “Vale Monsters.” They are the filler between boss windows and chest spawns.

    Rewards

    RewardQuality
    Royal WeaponRoyal (Q6)
    Royal ArmorRoyal (Q6)
    Royal AccessoryRoyal (Q6)
    Orange GearOrange (Q5)
    Orange Accessory BlueprintOrange (Q5)
    MVP CardOrange (Q5)
    MVP MountOrange (Q5)
    Rare AccessoryOrange (Q5)
    Common Hair DyeGreen (Q2)
    Radiant Hair DyePurple (Q4)
    PalettePurple (Q4)
    Fashion DyePurple (Q4)

    The MVP Mount is the same one that drops from MVP kills, Endless Tower, and Time Corridor. Luminous Vale is one of the four places you can get it.

    There are instances that the following items are dropped: rare appearance and costume items, high-tier materials, and a boosted accessory drop rate.

    It does not cost your daily combat budget

    Luminous Vale farming does not consume your daily blessing points. That budget is the 3,000 Healthy Combat points plus 600 Monster Extermination points that cap normal field farming. Luminous Vale runs outside that cap, so it is extra farming on top of your normal daily grind.

    Tips

    • Run Peace Mode for the farm and switch to Justice or Battle only when you want to PvP.
    • Be on channel 1 for the boss windows at 09:00, 12:00, 15:00, and 18:00.
    • Search the full map for the Rainbow Chest Monster. Its spawns are random, up to about 7 times a day.
    • Team up for the boss windows. The boss rewards go to the last-hit party, so having more people on the target helps.
  • Equipment Forging Guide and How you can Get Better Equipment Traits?

    Equipment Forging Guide and How you can Get Better Equipment Traits?

    Forging is how you get most of your gear in Ragnarok: The New World. You do not buy weapons and armor from an NPC shop. You forge them. The system uses molds, crystals, and embers to produce random equipment from a level-gated pool.

    This guide covers the materials you need, the two forging modes, the mold level brackets, and the equipment trait system that can turn an ordinary piece of gear into a build-defining item.

    Key takeaways:

    • Forging is your main source of gear from Lv 25 through endgame. The material costs are straightforward: Forging Crystals from the Points Shop or Pass Shop, mold boxes from the Supply Shop for Zeny, and Godforged Embers from Arena Coins or Starstones when you are ready to hunt orange traits.
    • The trait system is where forging gets deep. Armor and cape share one universal pool across all levels, so forge those cheap. Weapons and accessories use class-specific pools that change by bracket, so plan your transfers carefully. A Lv 40 weapon trait transferred to a Lv 70 weapon can give you effects that weapon could never roll on its own.
    • The pity system keeps the grind honest: 30 forges guarantees a purple trait on common forge and an orange trait on enhanced forge. The wishlist pity at the third miss makes targeted trait hunting possible.

    Forging Materials

    Every forge attempt needs two things: a Forging Crystal and a Forge Mold.

    Enhanced forging adds a third material: the Godforged Ember.

    Forging Crystal (Blue)

    The basic crystal consumed in every forge attempt both common or enhanced.

    Where to get?

    SourcePrice
    Points Shop4 Assist Coin
    Pass Shop S1–S610 Pilgrimage Token
    Return Shop20 Return Points

    Forge Mold Choice Boxes

    Molds determine what level bracket you forge in. Each box gives you a mold for a specific equipment slot at that level.

    Mold LevelSupply Shop (Zeny)Return ShopNovice Shop
    Lv 2530,000 Zeny
    Lv 4040,000 Zeny200 Return Points40 Novice Points
    Lv 5580,000 Zeny400 Return Points80 Novice Points
    Lv 70120,000 Zeny600 Return Points
    Lv 80120,000 Zeny800 Return Points
    Lv 90120,000 Zeny800 Return Points

    The mold boxes are blue quality.

    Molds are slot-specific. There are separate molds for weapon, armor, cape, shoes, accessory, and off-hand.

    Godforged Ember (Orange)

    Used only in Enhanced Forge. This item increases the chance of obtaining top-tier Special Skill gear.

    SourcePrice
    Points Shop50 Arena Coin
    Starstone Shop50 Bind Rune Starstone
    Pass Shop S1–S650 Pilgrimage Token

    Without a Godforged Ember, you cannot get orange-quality equipment traits.

    Common Forge vs Enhanced Forge

    The forge has two modes:

    Common Forge:

    • Uses Forging Crystal + Mold.
      • Produces blue, purple, or orange gear. Orange gear from common forge almost always comes with a trait. Blue and purple gear have a low chance.

    Enhanced Forge:

    • Uses Forging Crystal + Mold + Godforged Ember.
      • Same gear output, but the Godforged Ember enables orange-quality traits, called epic special skills.

    You do not choose which specific item you get. The forge pulls randomly from all gear in that slot and level bracket. A Lv 40 bow mold might give you an Elverbow, a Hunter Bow, or another bow.

    Mold Level Brackets

    Each mold level corresponds to the level your character needs to equip the resulting gear.

    BracketLevelsNotes
    25Lv 25 gearEntry-level forged gear
    40Lv 40 gearFirst major upgrade point
    55Lv 55 gearMid-game gear
    70Lv 70 gearLate-game gear
    80Lv 80 gearLate-game gear
    90Lv 90 gearEndgame gear

    The mold boxes for Lv 70, 80, and 90 all cost the same 120,000 Zeny at the Supply Shop. The Return Shop cost increases from 600 to 800 Return Points at the higher brackets.

    Molds have weekly purchase limits at the shop.

    Equipment Traits

    This is the system that makes forging worth the investment. Equipment traits are random skill affixes that appear on forged gear. A good trait can change your entire build.

    What Are Equipment Traits

    Traits are skill lines that appear randomly during forging. You can see the available purple and orange traits for any piece of gear in the Wishlist menu, the heart icon in the upper-right corner of the forge screen. Pick one trait as your wishlist target.

    Traits come in four quality colors:

    • Green – lowest tier
    • Blue – common
    • Purple – rare (epic)
    • Orange – legendary (top tier)

    Orange-quality gear almost always gets a trait. Blue and purple gear have a low chance.

    5.2 Which Slots Get Traits

    SlotHas Traits?Trait Pool
    WeaponYesClass-specific, varies by level bracket
    ArmorYesUniversal pool (shared with Cape)
    CapeYesUniversal pool (shared with Armor)
    AccessoriesYesClass-specific (shared with Weapon pool)
    ShoesNo
    Off-Hand (Shield)No

    Shoes and off-hand cannot get traits.

    Weapon Traits: Class-Specific and Level-Gated

    Weapon traits come from a class-specific pool. The pool changes by level bracket:

    BracketWeapon LevelsTrait Pool
    1Lv 15, 25Unique pool
    2Lv 40, 55Unique pool
    3Lv 70Unique pool
    4Lv 90Unique pool

    The traits available at Lv 40/55 are not the same as those at Lv 70 or 90. Each bracket has exclusive traits that do not appear in higher brackets.

    Example (Knight): The 40/55 bracket has traits like Thorn Body, Balanced Attack, and Flame Heart. Destroy Charge which makes charge-attacked enemies take increased damage and lowers all their control resistance by 70% and is exclusive to the 40/55 bracket. You cannot get it from a Lv 70 weapon forge.

    Armor and Cape Traits are Universal

    Armor and cape share one trait pool of about 30 traits. These are mostly defensive or utility effects: percentage elemental resistance, damage reduction, and similar stats.

    The pool is identical across all levels. A Lv 25 armor forge pulls from the same trait list as a Lv 90 armor forge. This is the most important efficiency trick in the whole system.

    Accessory Traits

    Accessories share the weapon’s class-specific trait pool. If you wear two accessories with the same trait name, only the highest-quality version takes effect.

    Example (Knight): Getting Dual Sword Dance on an accessory gives 20% bonus block chance. Unyielding Spirit on another accessory gives the Endure skill two charges and a shield worth about 20% of your max HP after using Endure.

    Pity System

    The forge has two pity counters:

    TypeTriggerReward
    Common ForgeEvery 30 forgesGuaranteed purple trait (random level)
    Enhanced ForgeEvery 30 forgesGuaranteed orange trait (random level)

    There is also a wishlist pity: if you fail to get your selected wishlist trait two times in a row on a purple or orange trait roll, the third purple or orange trait is guaranteed to be your wishlist trait but at a random level.

    rait Levels

    Traits have levels that determine the strength of the effect. The level is random when the trait appears.

    Trait Strategy: Forge Low, Transfer High

    Once a trait is forged onto a piece of gear, its quality and level are fixed. You cannot upgrade a trait.

    What you can do is transfer it.

    Armor/Cape Strategy

    Since armor and cape traits are the same across all level brackets, you should forge cheap low-level gear (Lv 25–39 bracket) to hunt for traits. A Lv 25 mold costs 30,000 Zeny. A Lv 70 mold costs 120,000 Zeny. The trait pool is identical.

    When you get a good purple or orange trait on a low-level piece, save it. Transfer it to your Lv 70+ gear later. This cuts your trait-hunting costs by roughly 75%.

    Weapon Strategy

    Weapon traits are trickier because the pools change by bracket. The strategy works in reverse: if a lower bracket has a trait you want that does not exist in higher brackets, you forge a low-level weapon specifically to get that trait, then transfer it up.

    Using the Knight example: if you want Destroy Charge (40/55 bracket exclusive), forge a Lv 40 or Lv 55 weapon until you get it, then transfer the trait to your Lv 70 weapon. Your Lv 70 weapon now carries a trait it could never roll on its own.

    Accessory Strategy

    Accessory traits are pure luck. You forge accessories as you level, and you keep anything useful. Even a low-level trait that matches your build is worth holding as you might need it later.

    Other Sources of Traited Gear

    Equipment from in-game activities can also drop with traits already on them.

    Tips for Efficient Forging

    Do not burn molds early. Molds have weekly purchase limits. If you blow all your Zeny on Lv 25 molds at the start, you will be resource-starved when you unlock higher brackets. Forge enough to get usable gear, then save for the next bracket.

    Use the wishlist. Always pick a wishlist trait before forging. The pity system only applies if you have one selected.

    Enhanced forging is for traits, not gear. You use common forge for the gear itself. You use enhanced forge (with Godforged Embers) only when you are hunting for orange traits. Do not enhanced-forge just to get a basic orange weapon as the ember is the expensive ingredient, and you want it working toward trait pity.

    Keep traits from old gear. Do not throw away a piece of gear with a good trait just because the gear itself is outdated. Transfer the trait first.

  • Life Skills Guide: Which Professions to Level First?

    Life Skills Guide: Which Professions to Level First?

    The life skill system in Ragnarok: The New World is not optional side content. It feeds directly into your combat power through enhancement stones. This guide covers which professions to level, which ones can wait, and how the vitality economy works for F2P players.

    Key takeaways:

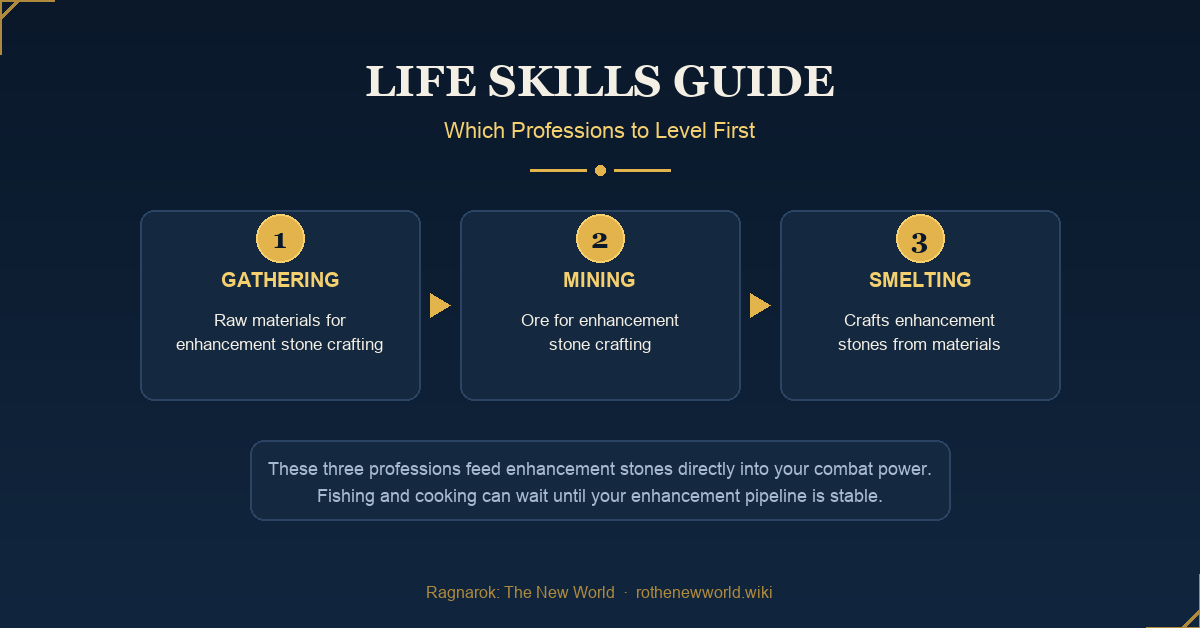
    • Level gathering, mining, and smelting first. These three professions feed enhancement stones directly into your combat power. Each amplify threshold (+10, +25, +40) unlocks bonus stat lines on your gear. The material demand is high throughout the early and mid-game.
    • Fishing and cooking can wait. They produce buff foods that sell, and personal use helps, but the return is lower than enhancement materials in the first two months. The database confirms 16 recipes across 6 towns, gated behind the Private Chef quest.
    • Spend your daily vitality. Event vitality adds up. Skipping days widens the gap.
    • Monthly card players get a vitality advantage. Two shop items (Western Herbal Tablets + Honey King) grant 560 extra vitality per day through Star Stones. The gap over two months is significant.
    • Gold is the bottleneck. Every life skill level costs gold. Pick your three and commit.

    The life skill system

    All life skills are learnable. Each one costs gold to level up, and the gold cost is substantial.

    The available professions:

    ProfessionWhat do you get from it?Priority
    GatheringRaw materials for enhancement stone craftingHigh
    MiningOre for enhancement stone craftingHigh
    SmeltingCrafts enhancement stones from gathered materialsHigh
    FishingFood buff ingredientsLow (early game)
    CookingMakes foods that is used for character buff. Can be for sale or personal useLow (early game)

    How gathering, mining, and smelting translate to power

    These three professions feed the enhancement system. Enhancement stones raise your gear’s amplify level. Each piece of gear has amplify thresholds that unlock bonus stat lines.

    Here is what you get at each threshold, using a typical weapon as an example:

    Amplify LevelWhat UnlocksExample Bonus (Shadow Weapon)
    +10First bonus stat lineRanged Magic DMG +2%
    +25Second bonus stat lineMATK% +3%
    +40Third bonus stat lineRanged Magic DMG +5%

    These bonuses are not small. Stacked across your weapon, armor, cape, shoes, and accessories, the amplify system is one of the biggest sources of combat stats in the game. A player who neglects enhancement falls behind fast.

    The material pipeline works like this:

    1. Gathering collects raw materials from the field.
    2. Mining collects ore nodes.
    3. Smelting combines gathered materials and ore into enhancement stones.

    Without these three skills leveled, you rely on the market or event drops for enhancement materials. The demand is high and the supply from events alone is not enough. Early game basic stones get consumed quickly, and moving to the next equipment tier requires the ultimate weapon enhancement stones. Being self-sufficient means leveling all three.

    The database confirms the full material ladder:

    Enhancement MaterialLevel BandSource
    Enhance StoneLv 1 to 20Elite/Mini event rewards
    Weapon Enhanced Metal IWeapons + Accessories 21 to 40Guild Shop Lv.1 100 Merit; Elite drops (12.5%)
    Weapon Enhanced Metal II41 to 60Guild Shop 200 Merit
    Weapon Enhanced Metal III61 to 80Guild Shop 400 Merit
    Weapon Enhanced Metal IV80+Guild Shop 800 Merit
    Armor Enhanced Spirit Stone IArmor/Capes/Shoes 21 to 40Guild Shop 100 Merit; Elite drops (12.5%)
    Armor Enhanced Spirit Stone II41 to 60Guild Shop 200 Merit
    Armor Enhanced Spirit Stone III61 to 80Guild Shop 400 Merit
    Armor Enhanced Spirit Stone IV80+Guild Shop 800 Merit

    Monsters drop only Metal I and Spirit Stone I. Normal monsters have a 0.007% drop rate. Elite variants (Ringleader, Swift, Solid, Furious, Elusive) drop them at 12.5%. Tiers II through IV have no monster source. Guild Shop Merit is the only path for those.

    The recommended path: gathering, mining, smelting

    Focusing on three professions for the first one to two months:

    1. Gathering. Collects raw materials.
    2. Mining. Collects ore.
    3. Smelting. Crafts the enhancement stones from gathered materials.

    The reasoning: enhancement stone consumption is huge. The gold cost to level all five life skills is too high for F2P and low-spending players. Budgeting wisely means picking the three professions that feed your combat power directly.

    Other life skills: fishing and cooking

    Fishing and cooking are not useless. They are just lower priority than the enhancement trio. Here is what each one does.

    Fishing

    Fishing supplies ingredients for cooking. The game has fishing spots across multiple maps. You catch fish that serve as recipe materials for buff dishes.

    Fishing does not produce enhancement materials. It does not raise your combat stats directly. Its entire value comes from feeding the cooking system, which is why it pairs with cooking and not as a standalone profession.

    Cooking

    Cooking starts with the Private Chef quest (unlocked in Prontera). After completing it, you can find cooking stations across six towns:

    TownRecipe
    PronteraGrape Wine, Cherry Jelly, Blueback Soup
    IzludeGreen Salad, STR Dish, Steamed Scorpion
    MorrocSupreme STR Dish, Purple Vadon Congee
    GeffenMagic Broth, VIT Dish
    AlbertaMana Chowder, Squid Tentacle Soup
    PayonFried Sweet Potato, Apple Pudding, Red Fish Hotpot

    The dishes that name a stat directly (STR Dish, VIT Dish, Supreme STR Dish) suggest the buff system grants temporary stat bonuses. Mana Chowder likely restores or boosts max mana. Magic Broth likely boosts magic-related stats.

    Cooked dishes can be sold for in-game currency. Players who want buff foods without leveling cooking themselves will buy from the market. If you want to earn in-game currency, cooking has a place. But the demand is limited compared to enhancement materials.

    For everyone else, fishing and cooking are a later-game investment. Once your enhancement pipeline is stable and you have spare gold, you can loop back and level them.

    The vitality system

    The life skill system runs on vitality points. You get a daily allocation. You also earn vitality from events:

    • Peers arena
    • Challenge activities.
    • Daily activity completions

    Run your dailies every day. The vitality from events adds up, and skipping them widens the gap between you and consistent players.

    The premium vitality gap (P2W)

    There are two shop items that grant extra vitality every day:

    • Western Herbal Tablet. Gives 460 vitality.
    • Honey King. Gives 100 vitality.

    Together, they add 560 vitality per day. These are purchasable with Star Stones, the premium diamond currency that monthly card players receive.

    Let’s do the math: 560 extra vitality per day × 30 days = 16,800 extra vitality per month. Over two months, that is 33,600 more vitality than a free-to-play player. That gap translates directly into more enhancement stones and faster gear progression.

    F2P and low-spending players: compare yourself to players with similar spending levels. Do not measure against monthly card players who get the extra vitality. Play at your own pace.

    Gold: the hidden cost

    Upgrading life skill levels costs gold. The gold consumption is high, and free-to-play players need to budget carefully. This is another reason to focus on three professions instead of spreading gold across all five.

    Source:

  • How Enchanting Works in RO: The New World?

    How Enchanting Works in RO: The New World?

    Enchanting is a gear upgrade system which enchants slots gems into your gear for extra stats. It works differently from refining because refining pushes a weapon from +1 to +20 with ores.

    This guide covers the gem slots, the costs, and the stat pool you need for efficient enchanting.

    1. Introduction

    You unlock the full enchant window through the Advanced Enchanting quest.

    Enchanting has two mechanics:

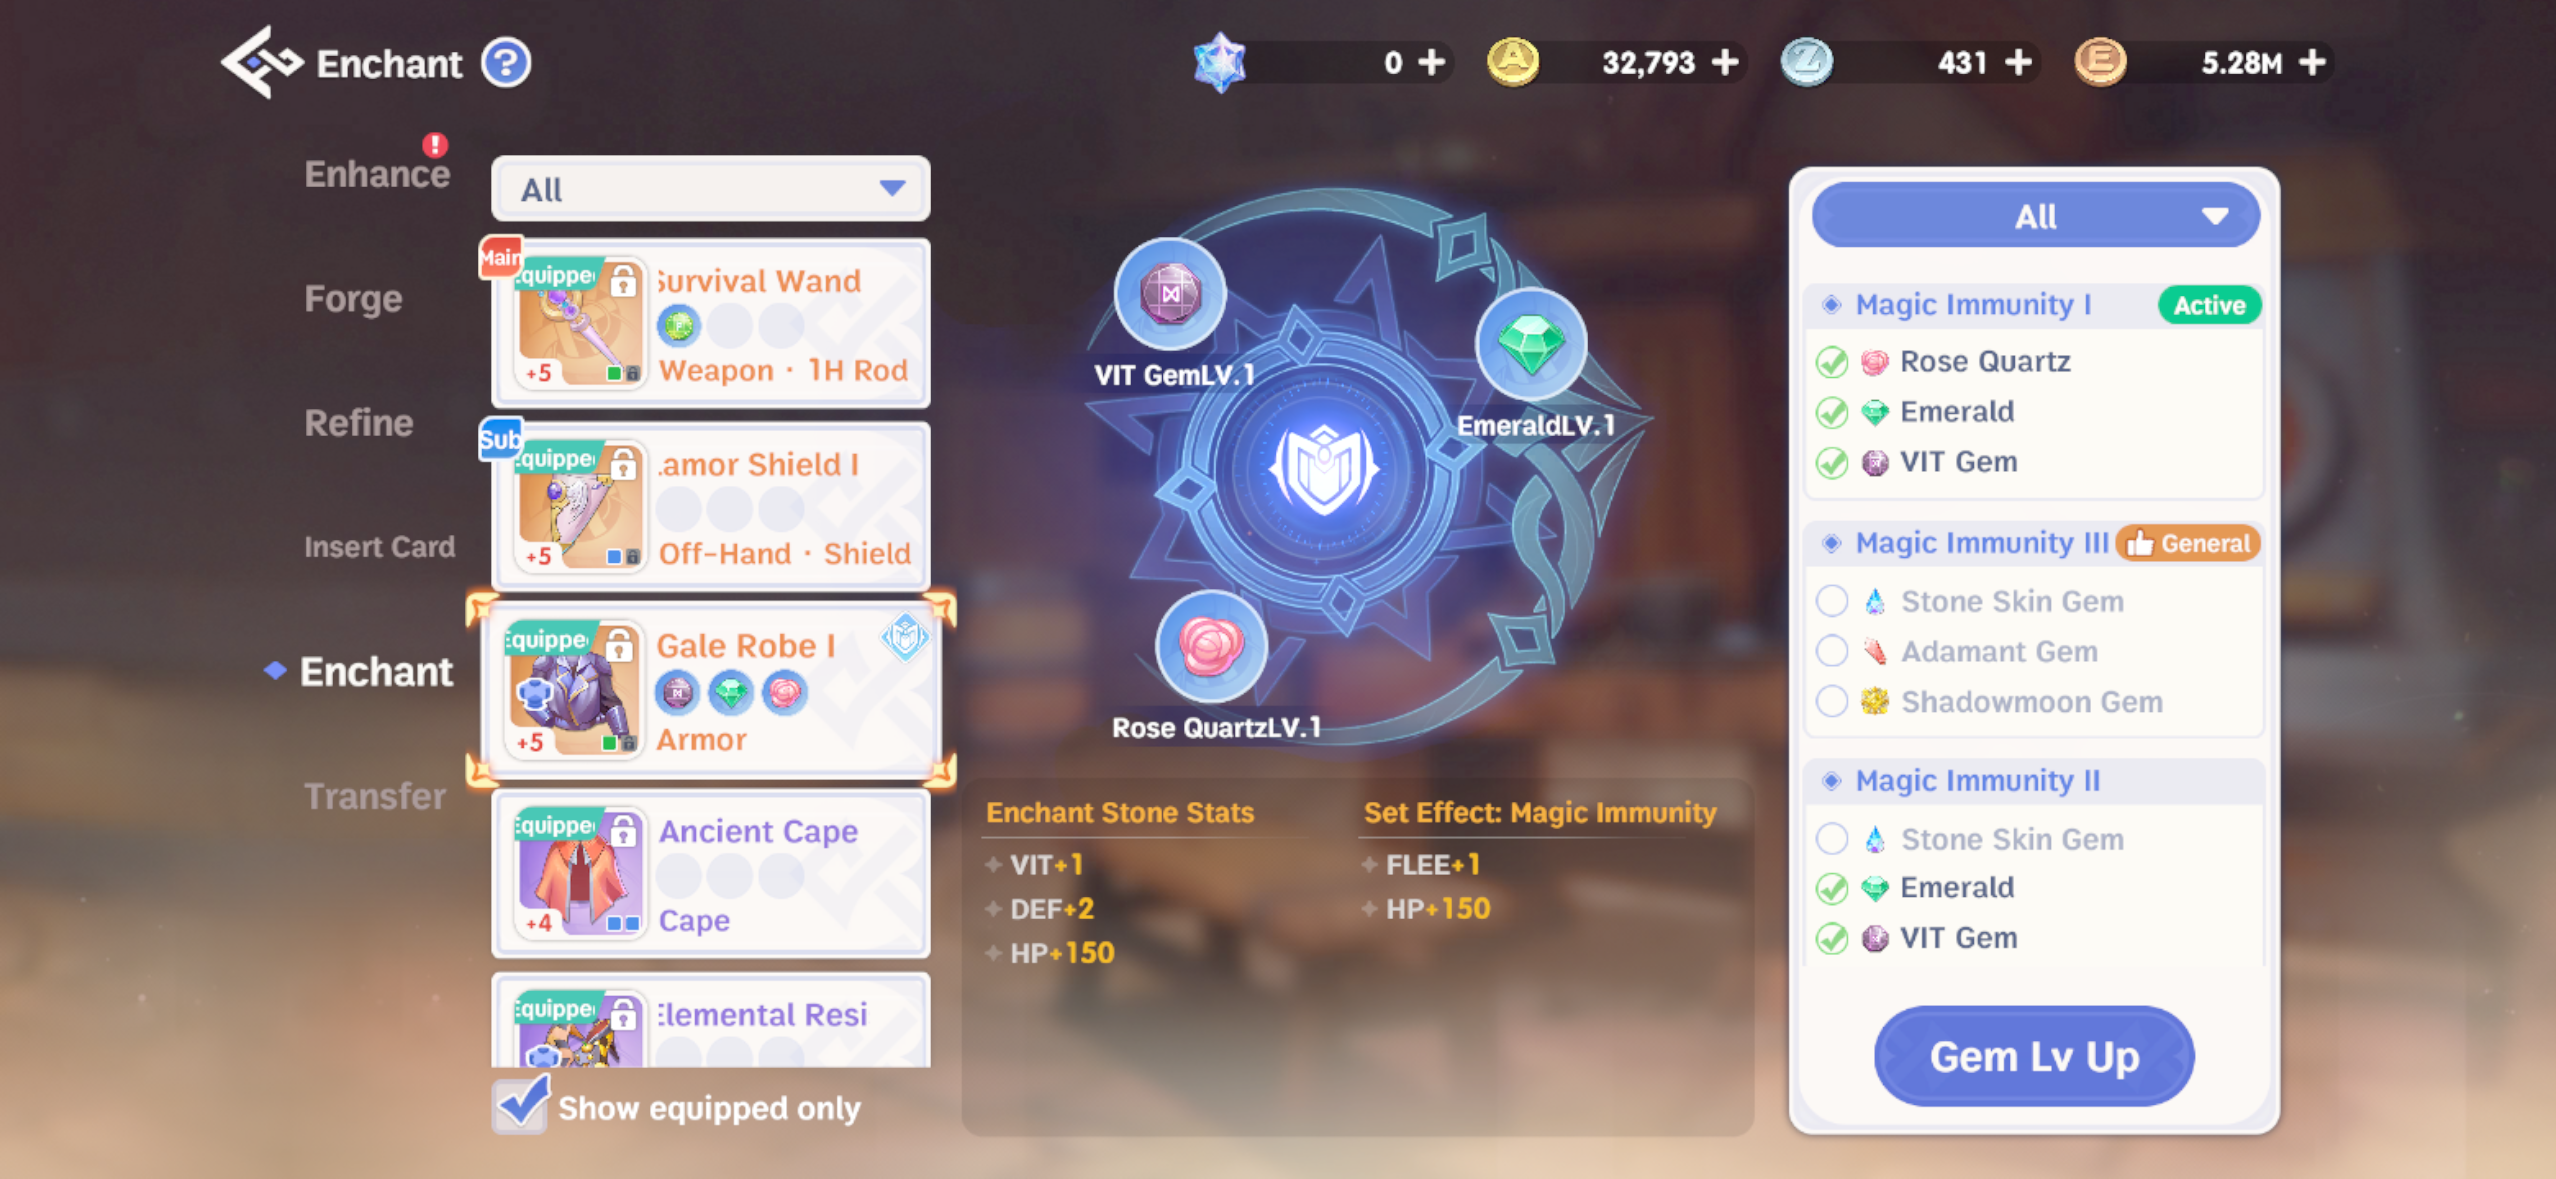
    • Gem slots on each piece of gear. You insert gems, and each gem adds stats.
    • Set effects that scale with your gem levels. When the gems in a slot group reach the same level, the set effect level rises with them.

    2. Special Enchantment

    Enchanting grants two kinds of stats

    • Common gems grant raw stats in flat values, such as:
      • HP +224 to +416
      • ATK +20 to +36
      • MATK +20 to +36
      • DEF +12 to +21
      • Stat points +4 to +6
    • Advanced gems grant multipliers:
      • ATK% +3% to +4%
      • MATK% +3% to +4%
      • DMG vs race +2.4% to +2.8%
      • DMG Reduction vs race
      • HIT and FLEE
      • CRIT RES
      • CRIT DMG RES
      • Status resistances (Petrify, Stun, Root, Blind)

    There are four value tiers and tier 46 is the strongest

    StatsTier 25Tier 26Tier 45Tier 46
    HP+224+320+292+416
    ATK+20+28+26+36
    MATK+20+28+26+36
    ATK% / MATK%+3%+4%
    STR / INT / AGI / DEX / VIT / LUK+4+5+4+6

    These same stats double as the fixed stat lines on shadow equipment, so the stat family drives both systems.

    3. Enchanting Cost

    Here are the materials you need to enchant your gears:

    MaterialWhere to getPrice
    Common Gem BoxPoints Shop25 Arena Coin
    Common Gem BoxGuild Shop Lv.1250 Merit
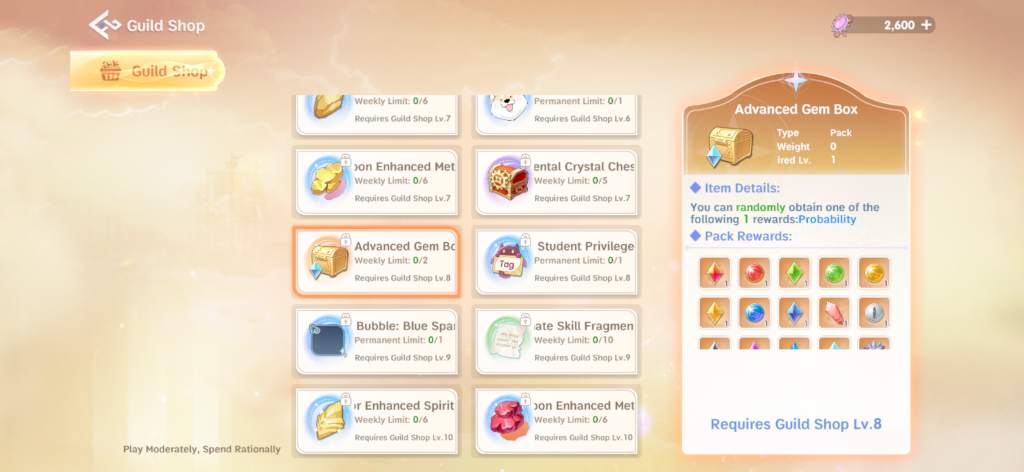
    Advanced Gem BoxGuild Shop Lv.12,000 Merit
    Common Gem Choice BoxReturn Shop / Novice Shop250 Return Points / 50 Novice Points
    Basic Magic StoneCrystal Shop / Starstone Shop5 Magic Dust / 10 Bind Rune Starstone
    Advanced Magic StoneGarden Shop / Crystal Shop / Starstone Shop10 Blooming Begonia / 10 Magic Dust / 50 Bind Rune Starstone

    You can get gems from Gem Boxes. The Common Gem Box feeds raw-stat gems. The Advanced Gem Box feeds multiplier gems, and it costs eight times as much.

    The Magic Stones can be used to reroll bonus Stats Attributes, Basic on Blue and Purple Elemental Crystals, Advanced on Orange Elemental Crystals. You spend a stone to re-draw the bonus stats on a crystal.

    4. Where to Get the Materials (Free First)

    No monster in the game data drops gems, Mora Coins, or Magic Stones. Every enchant material comes from a shop or an event. The free path runs through the shops first, then the events.

    enchanting leveling materials

    The free shop loop

    The Points Shop and the Guild Shop cover the whole gem ladder with free currencies:

    MaterialShopPriceCurrency source
    Mora CoinGold Coin Shop50 Gold Coinquests and event rewards
    Common Gem BoxPoints Shop25 Arena CoinPeer Arena (free PvP)
    Common Gem BoxGuild Shop Lv.1250 Meritguild dailies, banquets, contributions
    Advanced Gem BoxGuild Shop Lv.12,000 Meritguild activity, saved Merit

    Gold Coin is the free quest currency. The card quest chain alone pays about 7,000 Gold Coin, and the map quests add roughly 3,000 more, so Mora Coin at 50 Gold Coin each is one of the cheapest enchant materials in the game.

    Arena Coin comes from the Peer Arena. Merit comes from guild activity — dailies, banquets, and contributions. Neither costs real money.

    The SEA events that pay

    Two big events are confirmed on the official SEA site, with fixed schedules:

    EventSchedule (UTC+7)What it pays
    Siege War (Castle Siege)Sunday 21:00Guild occupation rewards, Castle Lord Chest, Guild Dungeon access
    War of KingsSaturday, 3rd week of the month, 13:00Server tournament rewards; top 3 advance to Cross-Server

    Siege War is the bigger weekly payout. The guild that holds a castle opens the Castle Lord Chest daily, and the Guild Dungeon spawns MINI and MVP for the whole guild — those feed the free card and refine loops, not just enchanting.

    War of Kings runs monthly, not weekly. It is a 5v5 team tournament with a server stage and a cross-server stage, and the official schedule pins it to the third week of the month.

    The event schedule on the official SEA site is the source of truth here. Event lists from other region builds do not match the SEA server, so this guide only cites events the official SEA announcements confirm.

    Elemental Crystals (the re-roll targets)

    The Magic Stones do not work alone. They re-roll stats on Elemental Crystals, and those come from chests:

    ChestSource
    Purple Crystal ChestCrystal Shop (150 Magic Dust), dungeon and event chests
    Elemental Crystal Chestdungeon and event chests
    Orange Crystal Chestdungeon and event chests

    If you decide the P2W route

    The F2W path covers everything, so this stays short:

    • Starstone Shop. Both Magic Stones sell for Bind Rune Starstone (10 for Basic, 50 for Advanced). Starstone is the premium currency, so this is the pay-to-reroll button.
    • Auction. Gem boxes and chests land at the Auction from guild events. Bidding is the shortcut if you don’t want to do Merit grind.

    5. Enchantment Level

    Every gem you slot can be leveled.

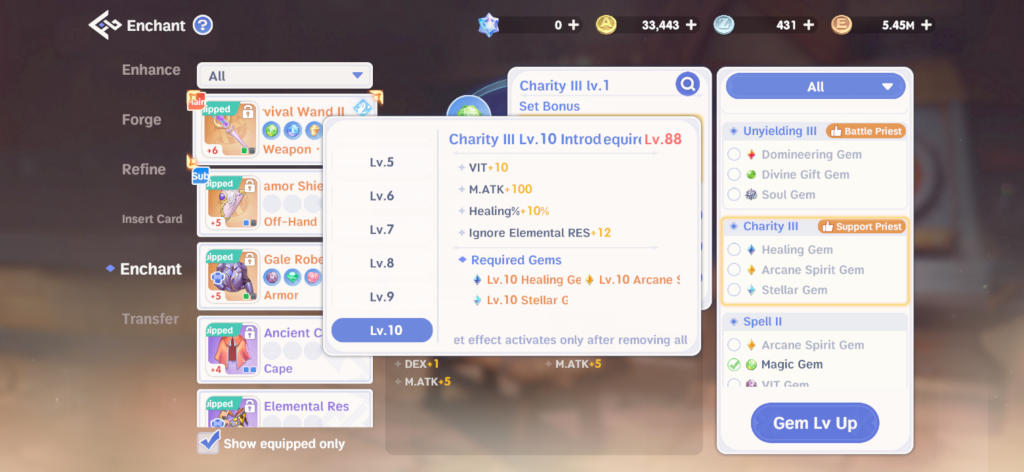
    Leveling works in groups. A gem at level 1 gives its base stats. Raise every gem in a slot group to level 2 and the group’s set effect steps up with them. Higher gem levels raise both the gem’s own stats and the set effect’s numbers.

    The exact per-level stat thresholds and the hard cap per equipment piece are not published in the game data.

    leveling enchants

    6. Pity System

    Enchanting has a pity counter. CBT guaranteed 30 enhanced enchants (180 Mora Coins) pays an orange or red special line, and you can slot a blue directed material to steer which line the pity pays out.

    The global game data does not carry a pity counter or a per-server number. Treat the 30-enchant figure as the beta-build behavior until the shipped build confirms it.

    7. Enchantment Resonance

    Resonance is the set-effect layer on top of enchanted gems. Each equipment slot type carries its own set families:

    • Weapon builds: Desperado (DEX + ATK + attack speed), Shotgun (DEX + ATK + P damage), Sniper (VIT + ATK), Gatling Gun (DEX + ATK + Max HP)
    • Armor: Magic Immunity
    • Cape: Physical Immunity
    • Boots: Fortitude
    • Accessories: the same families as the weapon

    The stats pool backs the stat families — ATK%, Max HP%, P damage, and resistances all exist in the 86-stats list. The exact set names, the piece counts per resonance level, and the per-level bonuses are not published in the game data.

    8. Enchantment Lock

    Locking protects a good roll while you re-roll the rest. The closed-beta guide describes locking slots with rare binding stones so a re-roll keeps your gold line.

    The game data does not name a locking item or its price. The closest documented consumables are the Basic and Advanced Magic Stones, which re-roll stats rather than lock them. Lock stone names, costs, and slot-lock limits are not in the database.

    9. Enchantment Transfer

    Transfer carries your enchant progress when you swap to a new piece of gear. In this game family, enchantment is tied to the character and auto-transfers to newly equipped gear.

    For Ragnarok: The New World specifically, the game data has no transfer mechanic, cost, or restriction on file. Do not treat transfer as confirmed until a patch note or the game UI verifies it.

    Bottom line

    • The enchant stat pool is 86 stats across four value tiers, capping at HP +416, ATK +36, MATK +36, ATK% +4%, and stat +6 in the strongest band.
    • The free path is complete: Arena Coin and Merit buy both Gem Box tiers, and the SEA events (Siege War weekly, War of Kings monthly) the rest it P2W.
    • There are 20-tier enchant group tier and 34 gem types.

    What this guide is lacking: the exact per-gear max enchant level, the global pity counter (if introduced), lock stone prices, and the transfer rules. Those stay unconfirmed until the game data or patch notes fill them in.

    Related: Life Skills Guide – enchanting and enhancement are separate systems. Enhancement stones (the other power system) come from gathering, mining, and smelting.

    The system to plan around: buy the Gem Boxes weekly, feed the slot groups evenly, and use Magic Stones to re-roll your weakest stats. The set effect payoff comes from leveling groups together, not one gem at a time.

  • How to Properly Utilize Field Combat? Daily Budget, Leveling, and What to Farm in Ragnarok: The New World

    How to Properly Utilize Field Combat? Daily Budget, Leveling, and What to Farm in Ragnarok: The New World

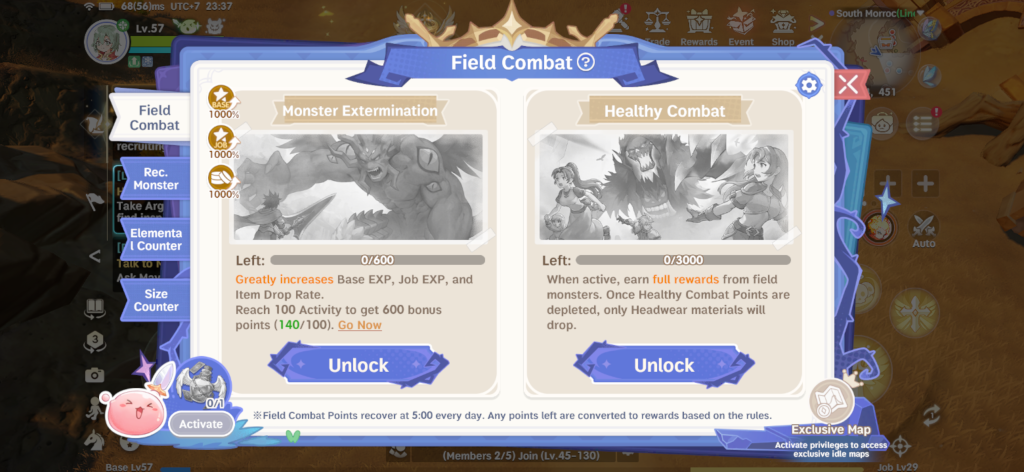
    You get 3,600 field combat points every day. That budget decides how much EXP and how many items you get from hunting in the field. Kills inside the budget pay full rewards. Kills beyond it pay almost nothing.

    Most players never check this number. They burn points on the wrong monsters, then wonder why leveling stalls.

    Here’s what this guide covers: how the system works, the leveling rules, what to farm, and the daily loop that spends it.

    The field combat system table

    PoolPoints per dayWhat it does
    Monster Extermination600EXP and drop rates boosted to 10x (1000%)
    Healthy Combat3,000Full EXP and item drops from field kills
    Total field combat3,600Everything above this pays headgear materials only

    You will get the 600 monster extermination points when your daily activity hits 100. So, do your normal dailies and you will hit it without trying. These 600 points are the best farming you will do all day, because the 10x boost applies to both EXP and drops.

    The 3,000 healthy combat points are your base budget. Kills inside them pay full rewards. Kills beyond the full 3,600 drop headgear materials only. Healthy Combat does not carry over to the next day. Unused points reset at 5:00 AM, and the game returns part of what you did not use by mail.

    The reset time matters. Check your server’s stamina bar timer. It does not always match local midnight.

    Spend the 10x pool first

    Do your dailies until activity hits 100. Claim the 600 Monster Extermination points and spend them on your best farming spots before anything else.

    Keep Healthy Combat off while you do quests. Turn it on only when you are ready to farm the field because quest kills do not need the budget. Toggle it on for the farming session and you get full value instead of leaking points into mission cleanup.

    The 110% rule: how leveling actually works

    Monsters 1 to 5 levels above you give 110% experience. Same-level monsters give 100%. Anything more than a few levels below drops to almost nothing.

    A level 50 monster farmed at level 55 returns 2 EXP per kill. A level 60 monster returns 341. That’s a huge difference between the right level gap and the wrong one.

    Use the in-game monster index sorted by level. Open the Recommended Monster list before you spend points. The game flags targets with the 110% bonus active. A fast-kill 110% target beats the “ok” mobs every time.

    BracketWhat works
    1 to 20Story quests and starter zones; short side quests
    20 to 40Field zones, party farming, monster-type matchups
    40 to 60Dungeons, regional story, daily instances; the 50s need field combat discipline
    60+Weekly content, MVP parties, event quests

    The Quest Board is the other half of daily leveling. It unlocks at level 32. Refresh the board until tasks show orange quality before accepting. Orange commissions pay more EXP and Zeny per minute than white or green ones.

    Board clears also pay Magic Gloves. The gloves spin the Adventure Wheel for Kafra Blind Boxes, treasure maps, Gold Coin, and Adventure Coin. Your first three board rounds take you from 33 to roughly 36. That is when the daily field battle counts unlock.

    What to farm with your points

    Cards: the progress-bar system

    Each monster drops one specific card. A progress bar fills as you kill that monster. At 100% the card drops guaranteed, and the bar resets. That bar is the real farming loop, and field combat are the fuel.

    Green and blue cards fill fast. The Yo-yo card went from 0 to 100% in one day. Purple cards fill slowly. Archer Skeleton moves about 10% per full 3,600-point day, so plan around ten days for that card. Minorous moves about 1.5% per day.

    Related: Life Skills Guide – your daily vitality also fuels gathering, mining, and smelting. See how to spend it across all life skills.

    Spend your points on monsters whose cards your build actually uses. Do not spend them on whatever is nearby.

    Normal monsters carry the card at roughly 0.02% per kill for green and blue cards, or 0.001% for purple. Elite variants change the math completely:

    VariantCard drop rate
    Normal monster, green/blue card~0.02%
    Normal monster, purple card~0.001%
    Elite (Ringleader/Swift/Solid/Furious/Elusive)3.25% (green/blue), 1.3% (purple)

    Elites respawn every 2 minutes at random field locations. You can also summon them with Dead Branches. They have roughly 10x HP, so farm them only if you one-shot them. A one-shot elite is the fastest card farm in the game.

    Refine materials

    The full table lives in the refine materials guide. Short version: normal monsters drop Elunium and Oridecon at 0.002857%. That is a dead end. Elites drop them at 5% plus Energy Core at 20%. The level-40 MVPs Angeling and Deviling drop Elunium and Oridecon at 28.57% and Energy Core at 50%.

    Refine materials are an elite-and-MVP game, not a normal-grind game.

    Bound Zeny and steady income

    178 normal monsters drop Bound Zeny at 10%. The 40 to 55 bracket (Yoyo, Vadon, Verit, Wolf, Zenorc, and friends) pays Bound Zeny plus Element Cores while you chase cards. That is passive income that funds the rest of your plan while the card bar fills.

    Your daily routine

    PriorityActivityWhy
    #1Daily check-in + claim mailFree coins, food, event tokens, 5 seconds
    #2600 Monster Extermination points on a 110% target10x EXP and drops, the best value in the game
    #3Quest Board, refreshed to orangeBest EXP per minute outside the 10x pool
    #4Time Corridor, all daily entriesGear materials beat most field farms
    #53,000 Healthy Combat points on your card targetFull rewards, card progress
    #6Guild dailies + Cat CargoGuild Contribution, Adventure Coin, Elunium, Oridecon
    #7Paradise DanceZero-combat Paradise Coins, under a minute
    #8MVP and Mini killsRoyal gear, cards, participation loot
    #9Everything elseExploration, chests, gathering

    Time Corridor is never optional for gear. It pays Royal gear and gear materials that no field farm matches. The MVP and Mini reward counters allow roughly 3 MVP and 5 Mini rewarded kills per day. Participate even if you only touch the boss. Participation loot exists.

    The timed events that pay

    The event calendar runs on server time. These are the ones that pay farming-relevant items:

    EventSchedulePays
    Mimic ChestWed, Sat, Sun 8:00-23:00, every 30 min, lasts 20 min, party of 3-5Royal gear, Orange gear, card books, refine materials
    Bounty HuntMonday 12:00 to 5:00 next dayElunium, Oridecon, Energy Core, crystal chests
    Rift RaidWed and Sun 10:30 to 5:00 next dayRoyal accessories, Ultimate Skill fragments
    Gold HeistMon and Fri 12:00-19:30, hourlyZeny, Guild Contribution, Royal gear
    Hazy ForestThu 21:30 (15 min)Enriched Elunium, Purple Card, pet eggs
    Forgotten LandSat 12:00 through the weekendAnvil, Kafra Blind Box, EXP
    Hoppy QuizFri 21:00Starstones (champion prize = 3,280, the Magic Broom price)

    What you are actually saving for

    The game throws a lot of systems at you. Strip them away and the farming goals are four:

    1. Your weapon to +10, then +15. Safe refine means failed attempts never drop your level, so every material spent is permanent progress. Resonance Level 2 at all +10 is the community’s F2P target before chasing higher.
    2. The damage cards for your build. Weapon and accessory slots first. Archer Skeleton, Bongun, Orc Archer, Magnolia, and their class equivalents. The card progress bar makes these a deliberate ten-day project, not a lucky drop.
    3. Royal gear from Time Corridor, MVP, and Mimic Chest. Gear materials from the corridor fund upgrades; the chests and bosses drop the pieces.
    4. Refine material stockpiles. Elunium, Oridecon, and Energy Core are the bottleneck for every +10 and +15 push. Elites and MVPs are the source.

    Spend field combat points only on monsters that advance one of these four goals. That is the whole trick.

    Bottom line

    Do your dailies to unlock the 600 Monster Extermination points. Spend those on a 110% target first. Run the Quest Board at orange and Time Corridor every day. Then burn the remaining 3,000 Healthy Combat points on the monster whose card or materials your build needs.

    Elite one-shots are the fastest card farm in the game. Normal grinding for refine materials is mathematically a waste of time.

  • Hidden Quests in Ragnarok: The New World – 149 Quest Lines, Mapped, With Rewards

    Hidden Quests in Ragnarok: The New World – 149 Quest Lines, Mapped, With Rewards

    This game features 149 hidden quests that won’t show up just by following the main “red dot” markers on your map. Every quest is listed with its location map (coordinates), step-by-step instructions, and rewards.

    The hidden quests are divided into groups: the card quests, the map quests, the story/system quests that unlock observation points, the cooking ladder, and the system unlocks. Each section below lists the rewards and the last section covers what finishing all of them gets you.

    1. Free cards quest

    prontera monster cards location

    Also called Card Diety quest.There are 40 card quests with a card icon on the map. Each one pays a specific card, plus 150-200 Gold Coin and a Kafra Blind Box.

    To get the exact location in the map, refer to our maps database.

    MapQuestCard reward
    Prontera South GatePoringPoring Card
    PronteraFabreFabre Card
    PronteraThief BugThief Bug Card
    PronteraHornetHornet Card
    PronteraLunaticLunatic Card
    PronteraYoyoYoyo Card
    Prontera Sewer 1FFemale Thief BugFemale Thief Bug Card
    Prontera Sewer 2FSporeSpore Card
    Prontera–Geffen RouteAmberniteAmbernite Card
    Prontera–Geffen RouteSavage BabeSavage Bebe Card
    East PayonWorm TailWormtail Card
    PayonGreatest GeneralGreatest General Card
    PayonBigfootBigfoot Card
    Forest DepthsBeetle KingBeetle King Card
    Desert–Payon TransitionMukaMuka Card
    Desert–Payon TransitionSteel ChonchonSteel Chonchon Card
    MorrocPickyPicky Egg Card
    MorrocDropsDrops Card
    MorrocPickyPicky Card
    MorrocCondorCondor Card
    MorrocBaby Desert WolfBaby Desert Wolf Card
    MorrocGiant WhisperGiant Whisper Card
    Sograt DesertMagnoliaMagnolia Card
    Mt. MjolnirMartinMartin Card
    Mt. MjolnirDrillerDriller Card
    Mt. MjolnirMantisMantis Card
    GeffenSquirrelCoco Card
    GeffenFlying PetiteSky Petite Card
    GeffenGround PetiteGround Petite Card
    GeffenRoda FrogRoda Frog Card
    Geffen Underground B1Baphomet Jr.Baphomet Jr. Card
    Labyrinth Forest 1FGiant HonetGiant Hornet Card
    Labyrinth Forest 2FSasquatchSasquatch Card
    Orc Cave 1FGolemGolem Card
    Orc Cave 2FZenorcZenorc Card
    Abandoned Mine 1FTarouTarou Card
    Abandoned Mine 2FCrampCramp Card
    Undersea Tunnel 1FMarinaMarina Card
    Undersea Tunnel 2FVadonVadon Card
    Sunken Ship 1FPirate SkeletonPirate Skeleton Card

    2. The map quests: Get gold coins and titles

    izlude map quest

    69 map quests across the cities pay 40-60 Gold Coin each. About 19 of them also grant a unique Title.

    Titles are the same item class as the competitive event rewards (Title: Crown of the Chosen), and most of these have no other free source.

    These quests unlocks the following titles:

    • Life Photo
    • Famous Adventurer
    • Different Uses of Training Dummies
    • Forest Conductor
    • High-End Setup
    • Cupid Descends
    • The Solitary Gourmet
    • Midnight Horror
    • Don’t Sleep Let’s Party
    • Troubling Society
    • Love Triangle
    • Talkative Person
    • Start a Dispute
    • Hidden Talent
    • Watching the Sea Together
    • On the Edge
    • God of Commerce
    • Outlaw
    • Guardian of Morroc.

    City counts and level gates from the map data:

    CityQuestsLevel gatesNotable quests
    Prontera16Lv 23-40Life Photo, Forest Conductor, High-End Setup, Prontera Secret Realm
    Morroc15Lv 23-40Alternative Assassination, Outlaw, Knee Reflex, Guardian of Morroc
    Alberta14Lv 23-40Dance Battle, Symmetry, God of Commerce, Misplaced Love
    Geffen14 (+6 in Tower)Lv 23-40Cupid Descends, Wishing Well, Haunted House
    Payon13Lv 23-40The Solitary Gourmet, You Jump I Jump, Three Zen Questions
    Izlude10Lv 23-30On the Edge, Dive In, Love Triangle, Talkative Person
    Dungeons12Prontera Sewers, Orc Cave, Abandoned Mine, Undersea Tunnel, Sunken Ship, Labyrinth Forest

    3. The exploration quests: observation point unlocks

    These quests unlock the observation points. Completing an exploration quest opens the observation points that list it as a requirement.

    ChainQuests in order
    Spring chainThara Frog’s Spring → The Rumored Moonlight Flower
    Peeping Tom chainCatch the Peeping Tom → Treasure Hunt
    Romance chainRecipe for Love → Aspirational Composer → Mysterious Letter
    Morroc chainCactus Crisis, Guardian of Morroc, The Man Gazing at the Sand, The Missing Waterskin, The Terrifying Demon
    City chainsLove Letter at Sunset, Alternative Assassination, Knee Reflex, Misplaced Love, Don’t Sleep Let’s Party, A Spark Ignites, On the Edge, Symmetry, Dive In
    Agent chainArunafeltz Agent → Common Agent 6 → Common Agent 23
    Card chainCard Deity! (the card system quest)

    “A Spark Ignites” is the most common gate. More than 30 observation points across Prontera, Geffen, Morroc, Payon, Izlude, Alberta and Aldebaran require it.

    4. The cooking ladder: permanent food buffs

    The Private Chef quest in Prontera starts the cooking system. Each recipe is its own quest, and each needs the one before it:

    Grape Wine → Cherry Jelly → Blueback Soup → Fried Sweet Potato → Apple Pudding → Red Fish Hotpot → Seafood Soup → Green Salad → STR Dish → Steamed Scorpion → Purple Vadon Congee → Supreme STR Dish → Magic Broth → VIT Dish → Squid Tentacle Soup → Mana Chowder.

    Cooking stations are marked in Alberta, Geffen, Prontera and the fields. Mana Chowder needs base level 38. The payout here is permanent: STR Dish, VIT Dish and Magic Broth become craftable stat-buff consumables, the free food edge for damage and survival.

    5. The emote and action quests

    A handful of quests in Geffen Tower, Prontera and Alberta are action-based. You use an emote or interact with a spot instead of fighting. The completion instructions give it away: “Imitate the Signpost” and “Dance” are emote quests. Cheap to do, easy to miss.

    Geffen Tower: Magic Flowers, Solitary Traveler, Imitating a Smokie’s Dance, Unemployed Mage. Prontera: Imitate the Signpost, Climb the Hill, Feed the Rabbit, Close the City Gate. Alberta: Dance, Rescue the Boy.

    What completing all of this unlocks

    Finishing the quests pays off beyond the one-time rewards. The systems they open keep working:

    1. The card system. 40 quests give you 40 cards. The cards fill your Card Handbook, and spare copies feed the Card Fuse system, which is itself unlocked by a quest. Handbook progress and fused cards stay with you permanently.

    2. The system quests. Refinement, enchanting, card fuse, ultimate skills, wardrobe, pet gear and relics all open through quests. Complete Advanced Refinement and Advanced Enchanting, or the refine button stays locked no matter how much you grind. Card Fuse unlocks card fusion. Ultimate Skill unlocks your second-job capstone.

    3. Titles. About 20 quests grant a unique Title each. These are permanent nameplate items, and most have no other free source.

    4. Observation points. The exploration chains open scenic points across every city. The points themselves record no direct reward in the game data, but they are the progression gate for the Adventure system.

    5. Permanent food. The cooking ladder turns 17 quests into a permanent recipe book. STR, VIT, Magic Broth, Mana Chowder and twelve more become craftable forever after.

    6. Currency. The card quests pay around 7,000 Gold Coin in total, the map quests another 3,100, and both lines drop 40+ Kafra Blind Boxes. Gold Coin is a real shop currency, so the network alone funds several Gold Coin Shop purchases.

    Bottom line: is it worth it?

    Yes. The 40 card quests are the only guaranteed free cards, and card attributes are the biggest damage multiplier in the game.

    The system quests unlock refine, enchant, card fuse and ultimate skills, and no amount of spending replaces those.

    The titles, the roughly 10,000 Gold Coin and the Kafra Blind Boxes are free income that only costs travel time between marked map points.

    Do them in this order: system quests first, the card chain as you level through each map, then the exploration chains, then the cooking ladder. The red markers will not take you to any of these. That is the point.

  • How to Change Mount in Ragnarok: The New World

    How to Change Mount in Ragnarok: The New World

    Changing mounts in Ragnarok: The New World is easy.

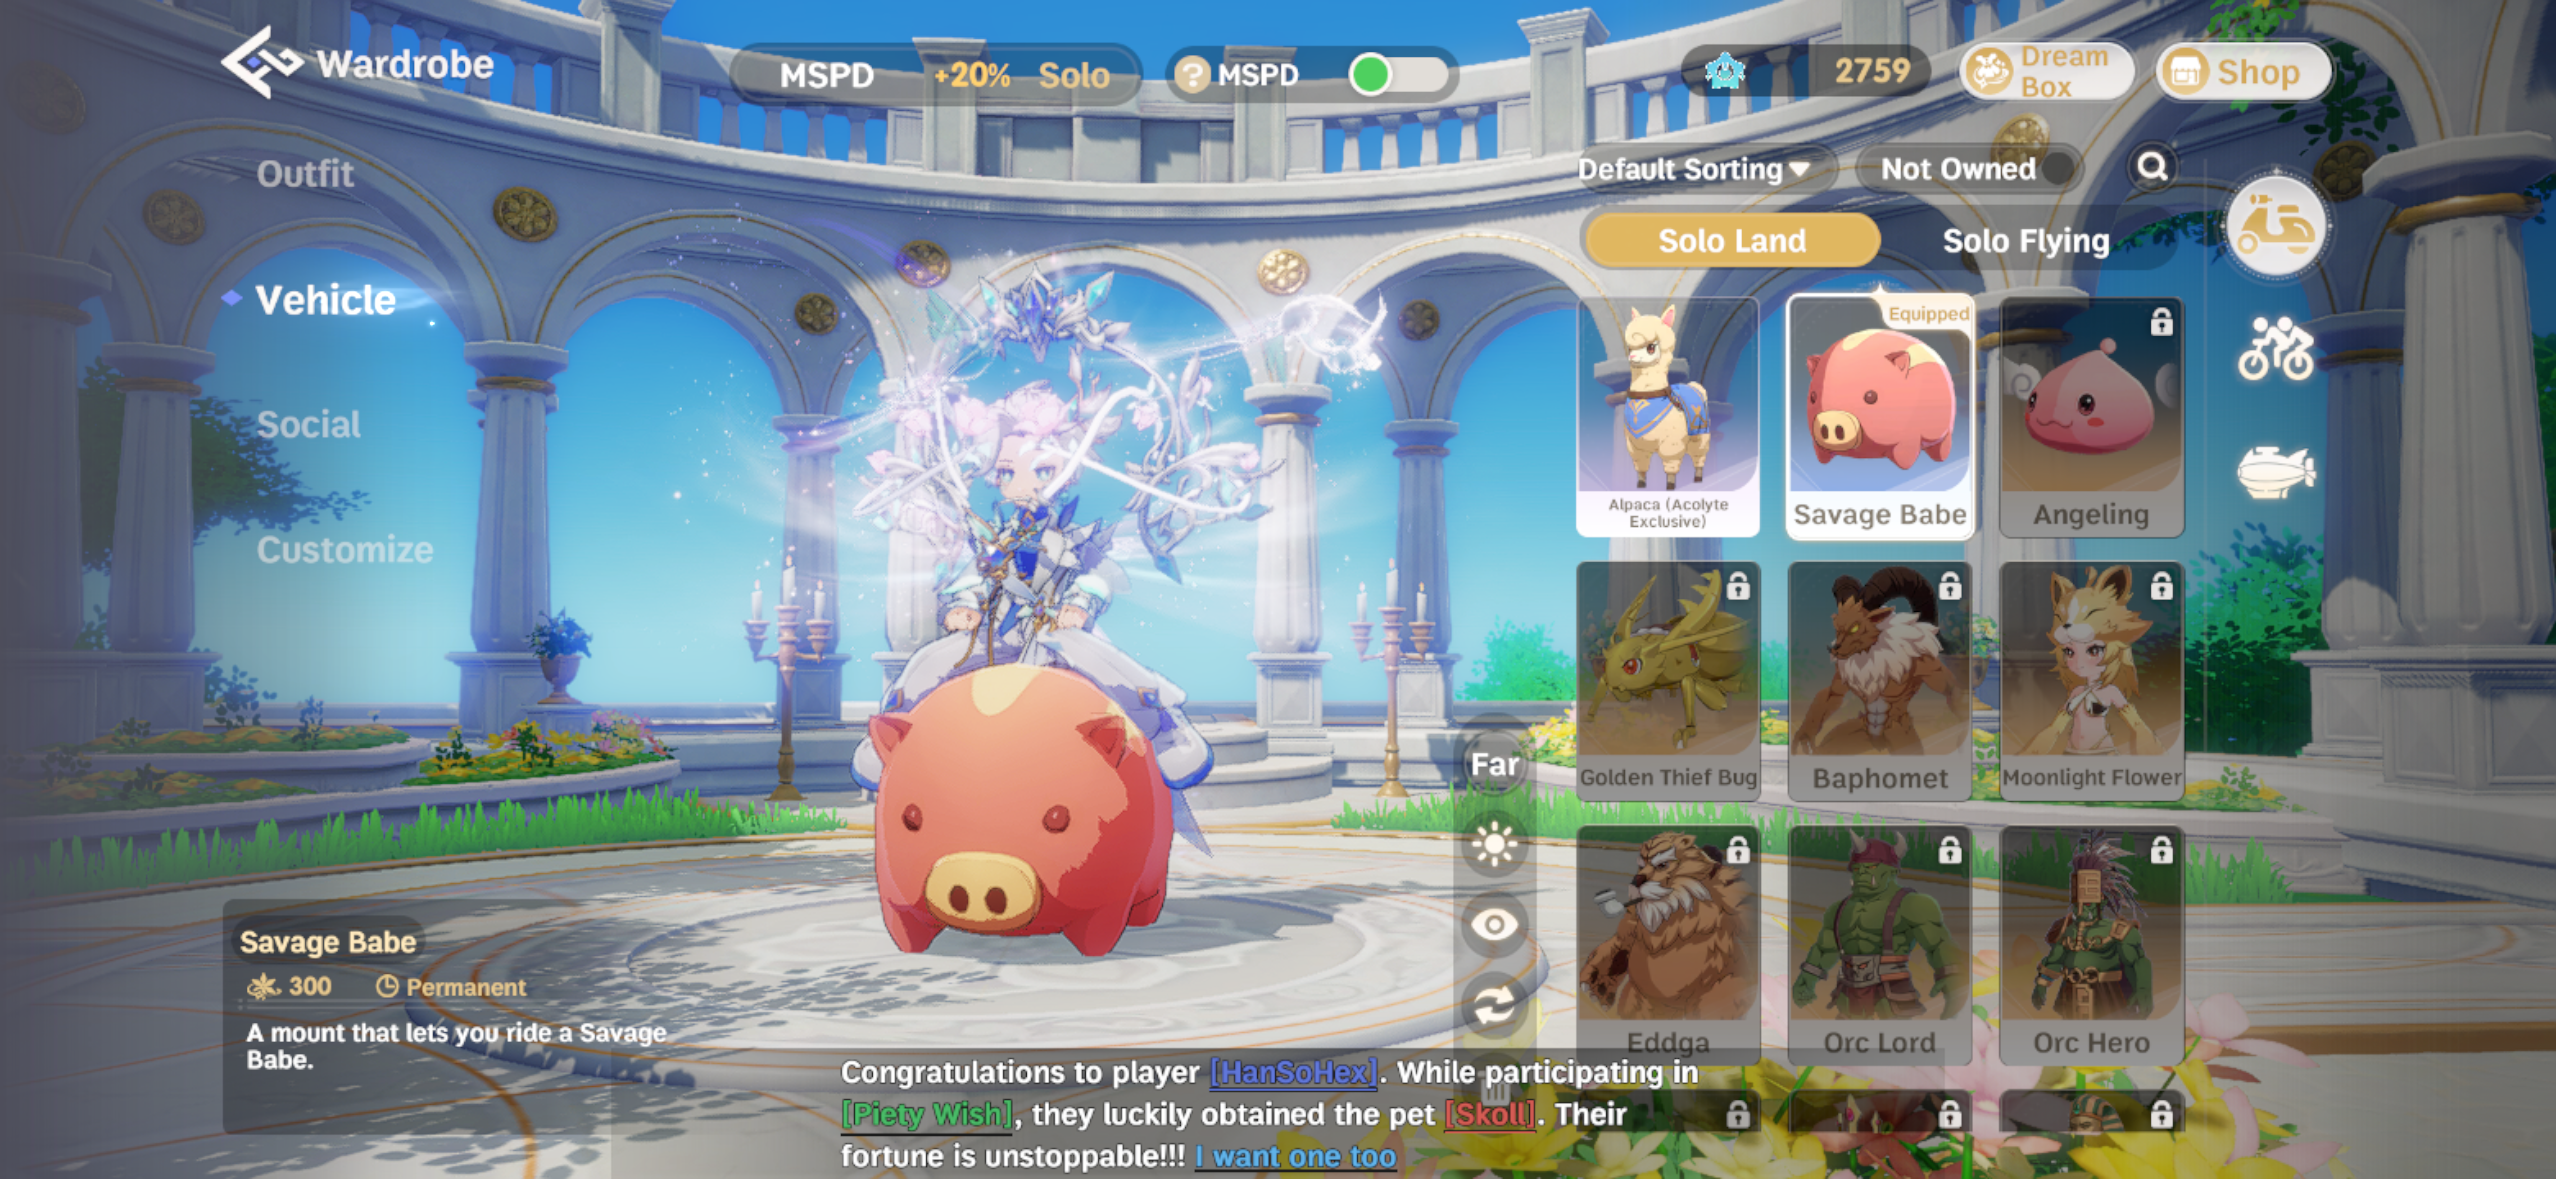
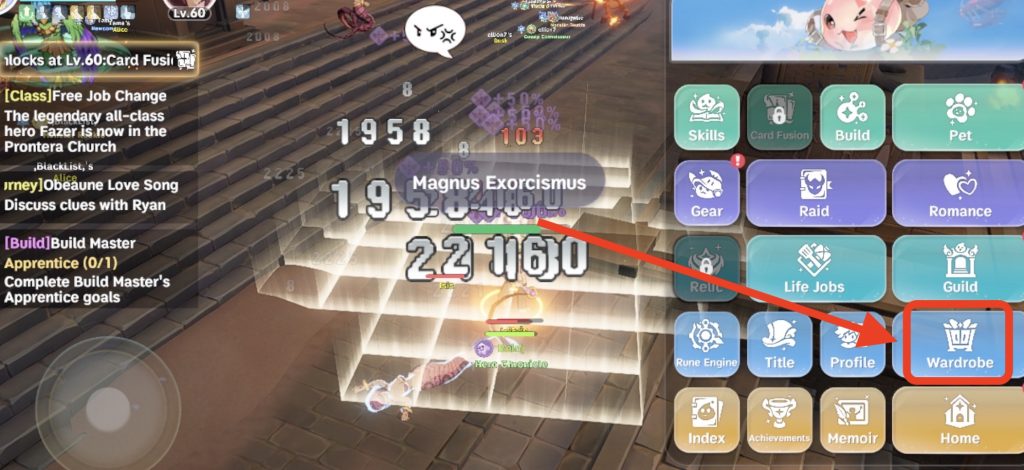
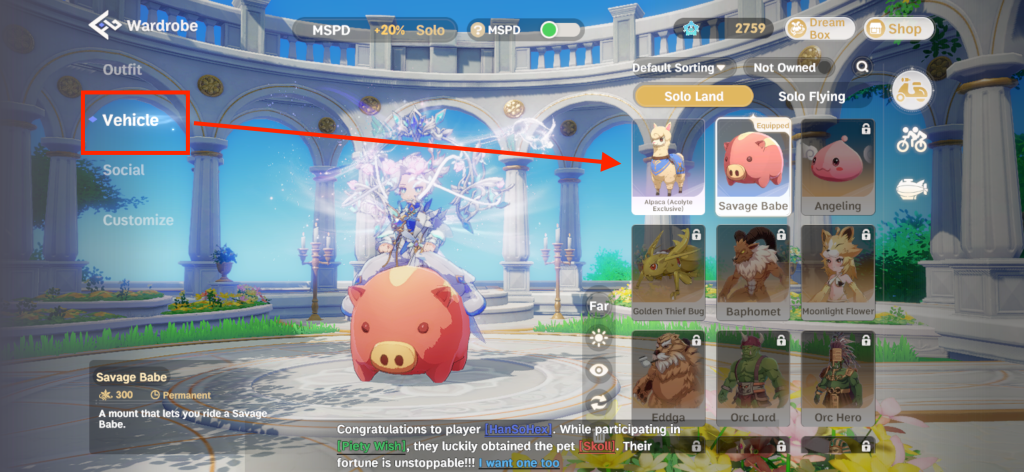
    Open the panel at the right side of the screen, pick Wardrobe, switch to the Vehicle tab, and choose the ride you want. That is the whole trick.

    Most guides cover where mounts come from, not how to swap them once you own a few.

    Think of the Vehicle tab as your garage. Every mount you own is parked there, and switching mounts is just picking another set of keys. Your character does not need to relearn anything, and you can swap back and forth as often as you like from the same tab.

    How to change your mount, step by step

    There are two ways into the same mount list. Pick whichever is faster for you.

    Path 1, from the main menu:

    1. Tap the menu button at the bottom right of the screen.
    2. Choose Wardrobe.
    3. Open the Vehicle tab. This is your mount collection. Everything you own shows here, from the starter Poring to MVP drops.
    4. Tap the mount you want to use. It equips instantly.
    Select “Wardrobe”
    pet mount banner
    Click “Vehicle” tab and select the mount that you want.

    Path 2, from your character:

    1. Tap your character portrait at the top left.
    2. Tap the portrait again inside the profile panel.
    3. Select the Vehicle tab from the row of options, which includes Outfit, Vehicle, Social, and Customization.

    Both paths open the same list, and the layout is identical on PC, where you click instead of tap. The game syncs your progress across phone, tablet, and PC, so a mount you equip on one device stays equipped on the others.

    How to ride and dismount

    With a mount equipped, the Ride button on your action bar mounts you up. Your character hops on and movement switches to ride speed. Press it again to dismount.

    One mount breaks the pattern. Mysteltainn, caught in Mount Mjolnir, does not carry you at all. It follows along behind you on its own, and watching its little feet drag is half the charm. Know that before you spend an orb on it.

    Mounts and pets: know the difference

    New players mix these up all the time, and the confusion costs them a few minutes in the wrong menu.

    Pets follow you and provide passive bonuses: auto-loot, stat boosts, or help in a fight. They deploy from the pet menu, not the Vehicle tab. Mounts are travel gear. They raise your movement speed across the open world and equip from the Vehicle tab.

    The two systems blur in some areas. Some evolved pets pick up small movement speed buffs that feel mount-like, and wild catches such as Mysteltainn are captured through the pet-catching minigame but used as mounts.

    When you are hunting for a new ride, the Vehicle tab is the source of truth.

    Mount rules worth knowing before you swap

    • Taking damage usually dismounts you, so do not open a mount mid-fight.
    • Indoor dungeons disable mounts. If the Ride button is greyed out, you are in a zone that blocks them.
    • PvP areas sometimes normalize mount speed, so a faster mount will not hand you an unfair advantage in a fight.
    • Some mounts are character bound, not account wide. Unlock one on the wrong character and it stays there. Check the mount’s entry in the Vehicle tab before investing in it.
    • Mount speed stacks with certain pet passives and garment cards. Farmers and merchants get the most from stacking these together.
    • Mounts move at different speeds. The bear, for example, is on the slow side at +20% run speed, while the class pet players compare it to gives +30%. If speed matters, compare the stat on each mount’s entry.

    How to get mounts in RO: The New World?

    SourceWhat you getNotes
    Beginner guideFree starter mount, a Poring-style companionArrives early through the beginner guide; the exact name varies by version
    Kill-count achievementsWolf, Vadon (the crab), Rocker, Ambernite, Picky Egg, FamiliarCheck Achievements under daily activities. The wolf takes 30,000 kills around Payon; the Vadon crab is another 30,000-kill milestone
    Encounter questsBigfoot bear, monkeyRandom quests that pop up as you play. Players report the bear quest triggering while refining gear and the monkey while crafting
    Job changeMotorcycleThe Gunslinger job line has its own motorcycle mount
    Wild catchMysteltainn (Godslayer)Found at Mount Mjolnir. Lower its resistance with milk, about three throws, then use an orb. The same system catches pets
    MVP dropsMVP mounts, flying mountsMVPs can drop mount items such as saddles, reins, or contracts, and your contribution ranking in the fight matters. The official store description says it plainly: defeat the MVP and make it your exclusive mount
    ShopsVarious mountsSome mounts are sold directly for in-game currency
    ExplorationBigfoot and other freebiesSome mounts come from simply wandering. One player reports getting Bigfoot after entering a house in Payon

    Gravity introduced the game’s first flying mounts around launch, with the promise that even MVPs can be mounts, so the collection only grows.

    FAQ

    How do I change mounts in Ragnarok: The New World?

    Open the bottom-right menu, go to Wardrobe, open the Vehicle tab, and pick the mount you want. The swap is instant.

    Why can’t I ride my mount?

    Three common reasons: you are in combat or just took a hit, you are in a dungeon that blocks mounts, or the mount is not actually equipped in the Vehicle tab. Pets are a separate system. A pet follows you; it does not replace your mount.

    Are mounts shared between characters?

    Not always. Some mounts are character bound, so equip them on the character you plan to ride.

    What is the easiest free mount to get?

    The beginner guide reward shows up first and costs nothing. After that, the wolf for 30,000 kills around Payon is the most straightforward kill-count mount.

    Do all mounts move at the same speed?

    No. The bear runs at +20% speed, slower than some alternatives, and mount speed can stack with pet passives and garment cards. Each mount’s entry shows its speed.

    Can I catch mounts like pets?

    Yes. Mysteltainn at Mount Mjolnir is caught like a pet: lower its resistance with milk, about three throws, then throw an orb. Aim carefully. The milk is bought with a currency you will want to save.